Smart Farm Creating Your Own Zones and Sensor Hubs
The Smart Farm Gateway is preconfigured with a sample zone and sample sensor hub, but you can create your own zones, sensor hubs on the Gateway UI using the steps below.
- Connect to the SmartFarmGateway WiFI network, use password smartfarm, login to Gateway UI using the URL http://192.168.0.1:8080/fid-smartfarmui/index.html, the login credentials are Admin/admin.
- Once you login to the Gateway, Click on "+Zone" button to create a new zone.
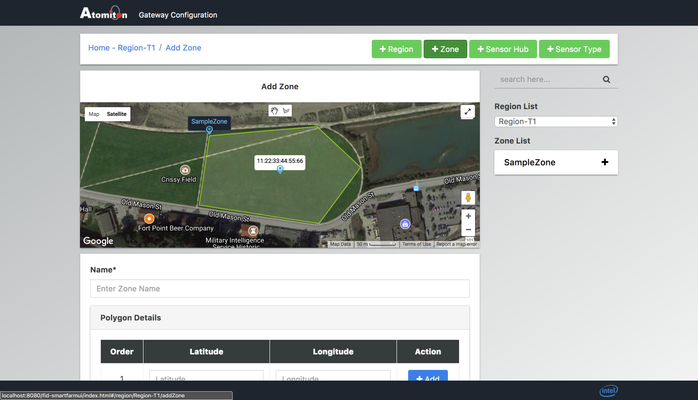
- Go to the area you are interested in and draw a zone there on the map using the drawing tool which is next to the hand icon on the map.
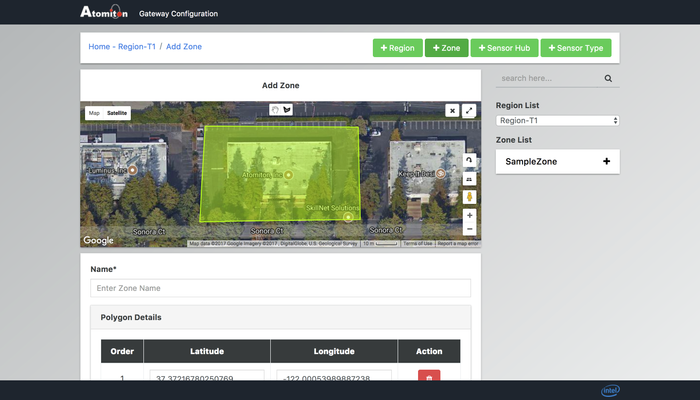
- Enter some name your Zone and click on "+Create Zone" button.
- If you have only one sensor hub and planning to use that sensor hub for your zone then you can delete the sensor hub from sample zone by go to SampleZone and select the Sensor Hub and delete it by pressing on "Delete Sensor Hub" button.
- Now you can click on "+ Sensor Hub" button scroll on the map to go to your zone and then click on add marker icon present on top right side of the map.
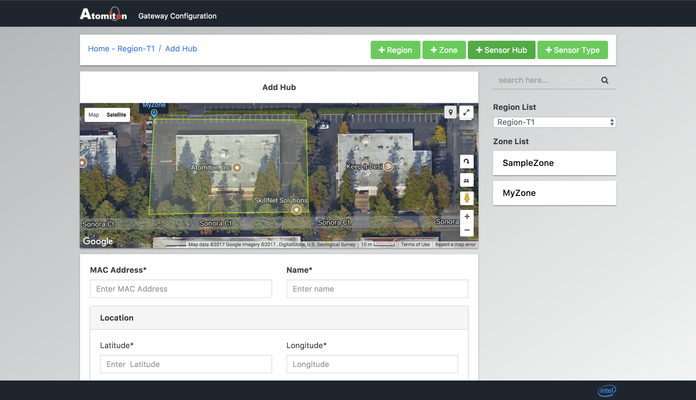
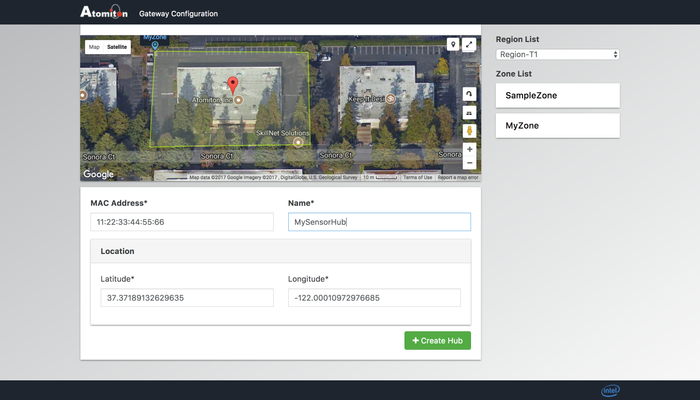
- Move the marker so that the sensor hub is within the zone you created, enter the mac address of the sensor hub which you can find on the sensor hub, and enter some name for your sensor hub and click on "+ Create Hub" button.
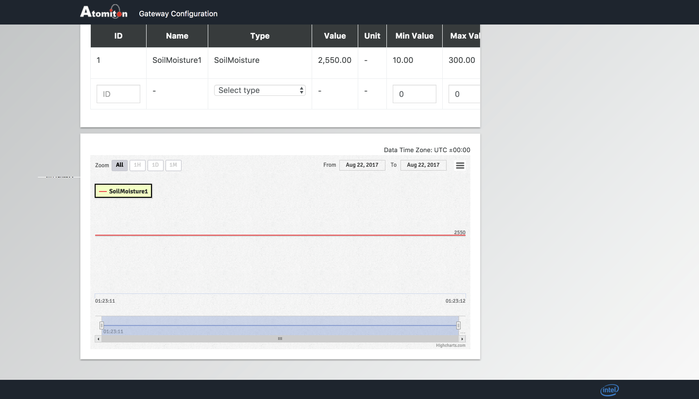
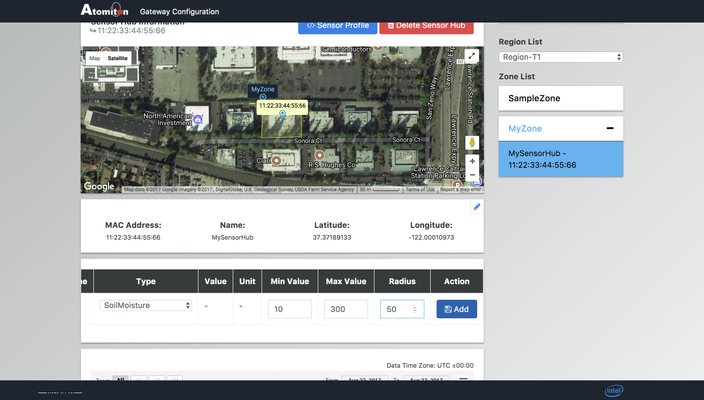
- Click on the sensor hub on the map or select the sensor hub present under the newly created zone in "ZoneList", add new soil moisture sensor in the sensor table as shown in images below, enter ID as 1, select type as Soil Moisture sensor, enter min, max and Radius as 10, 300, 50 and click on "add" button next to it. If your sensor hub has additional sensors you can add those sensors in this table.

- If the sensor hub is powered on you should start seeing sensor values both on Gateway and Cloud in few minutes.