If you have not heard of TQL before, here is a useful overview on why TQL.
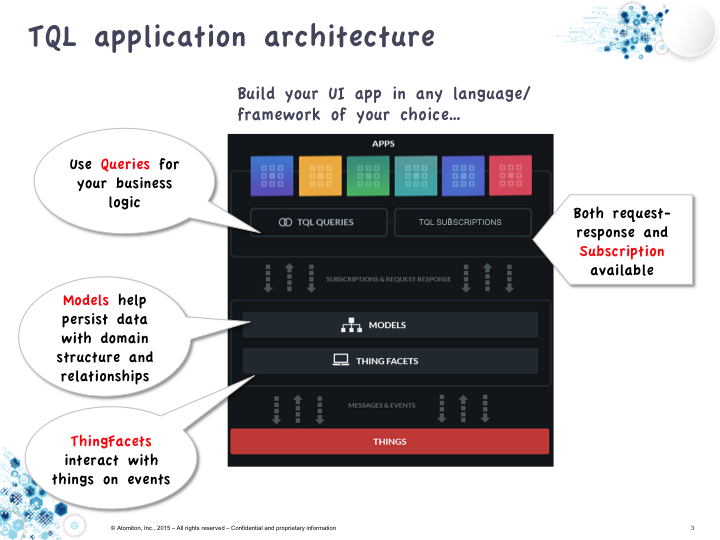
The application you write using TQL is called a TQL application, and here is the structure:
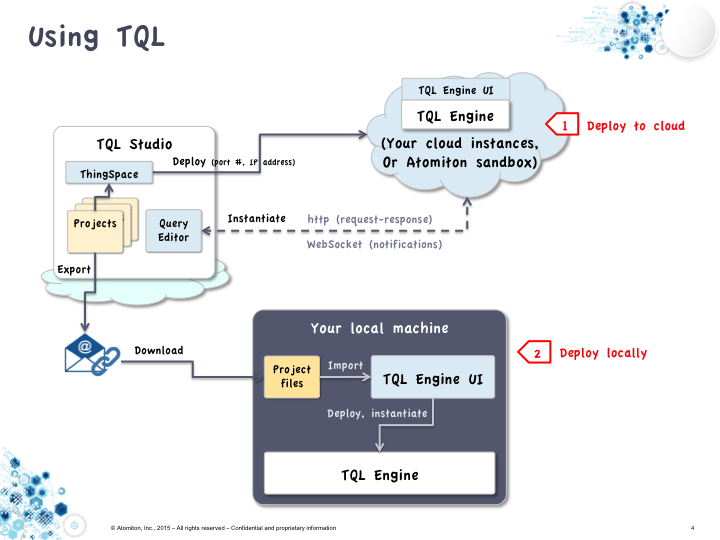
In short, TQL Studio is the entry to your TQL account. You create projects in the TQL Studio, and deploy them onto TQLEninges to run. You can run TQLEngines on your local computer, Raspberry Pi, Gateway, or cloud, or use the TQLEngine instance from sandbox we provide.
You can directly deploy your projects to your local computer, or to computers with public IP addresses. Alternatively, you can export your project and then import to a local TQLEngine which runs on a computer without public IP address.
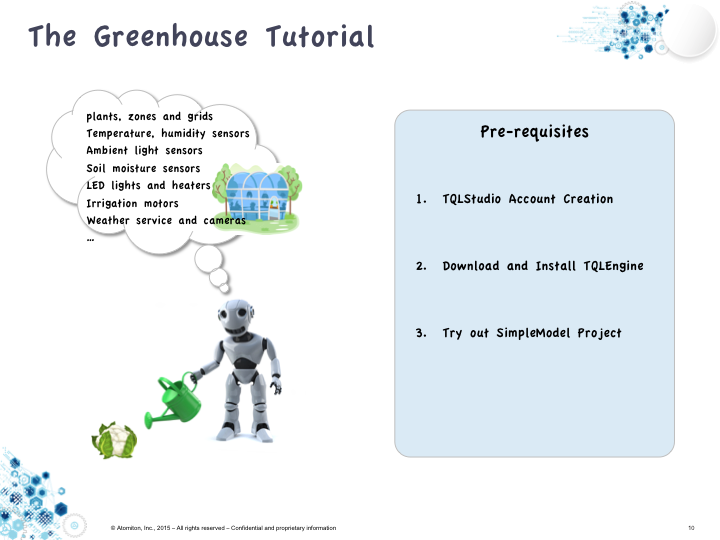
In this set of tutorials, we will use TQL to build a Smart Greenhouse, with sensors, actuators, thing models, data models and application models.
Now let's create a TQLStudio account and look at a sample project. We will download and install TQLEngine at the end of this session.
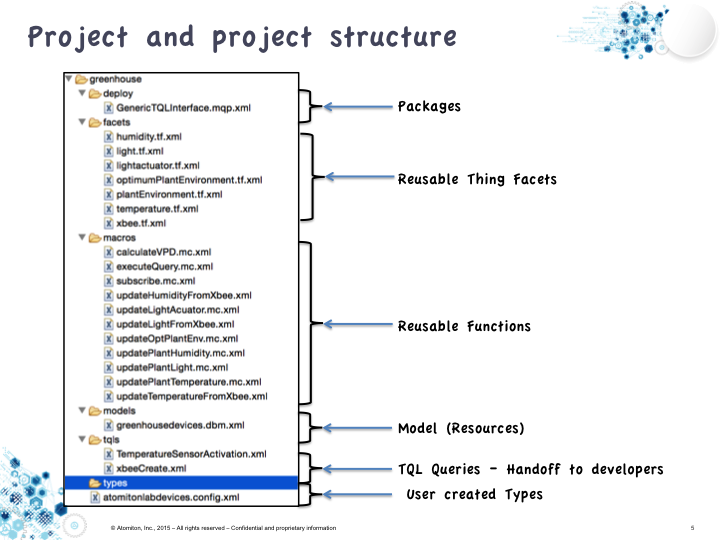
If you followed steps, you will have seen the source code for a sample temperature sensor ThingModel and ThingFacet. This project that you have imported and tried has the following structure: